Kategoria: Patterns

  • Mr Cat – part 3 -trousers & assembly

    Check out the previous Mr Cat parts – Part 1 Part 2

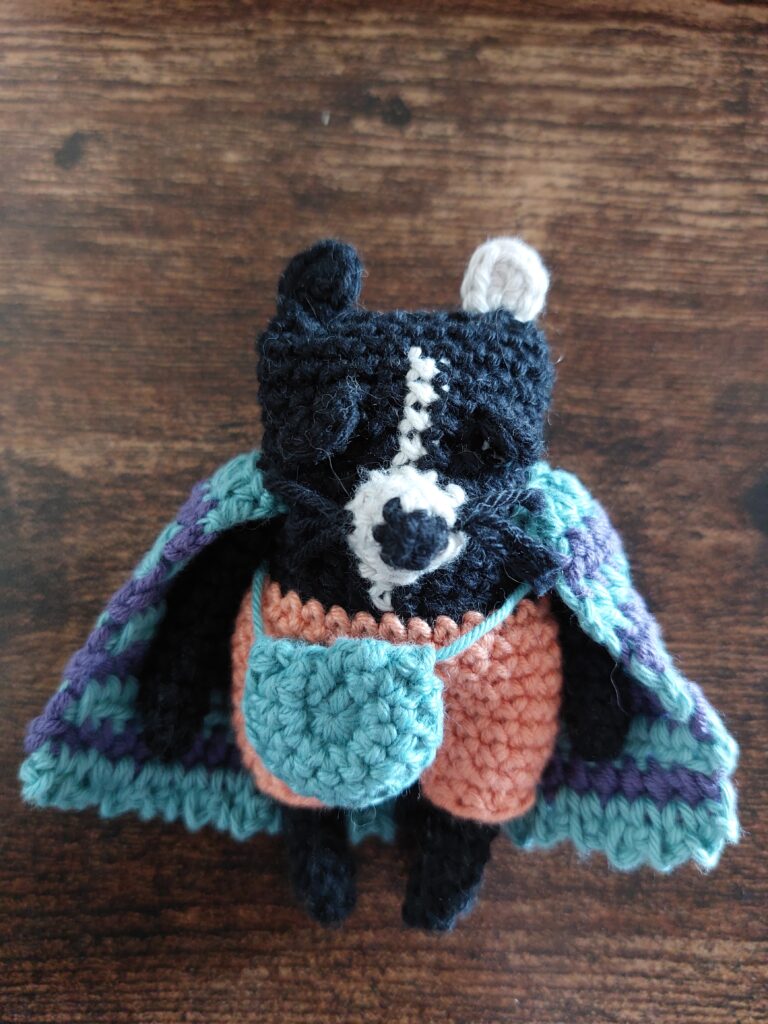
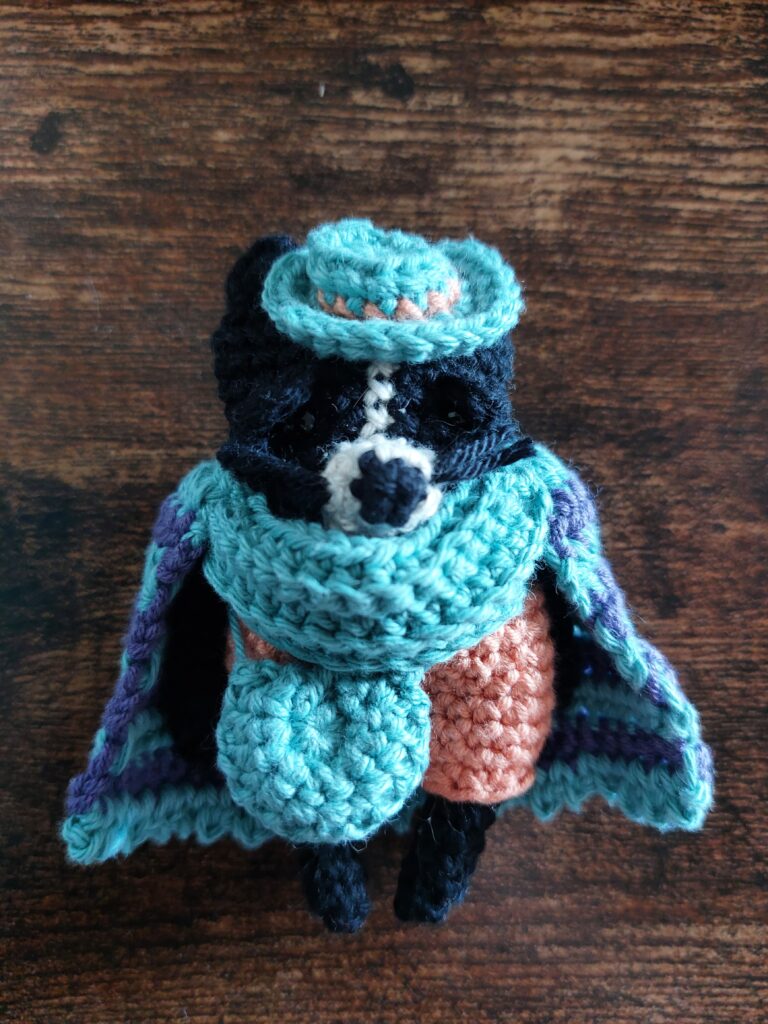
    It is time for the final part of our Mr Cat crochet pattern – trousers and assebly of clothes. We will start with the trousers. Let’s go!

    Trousers

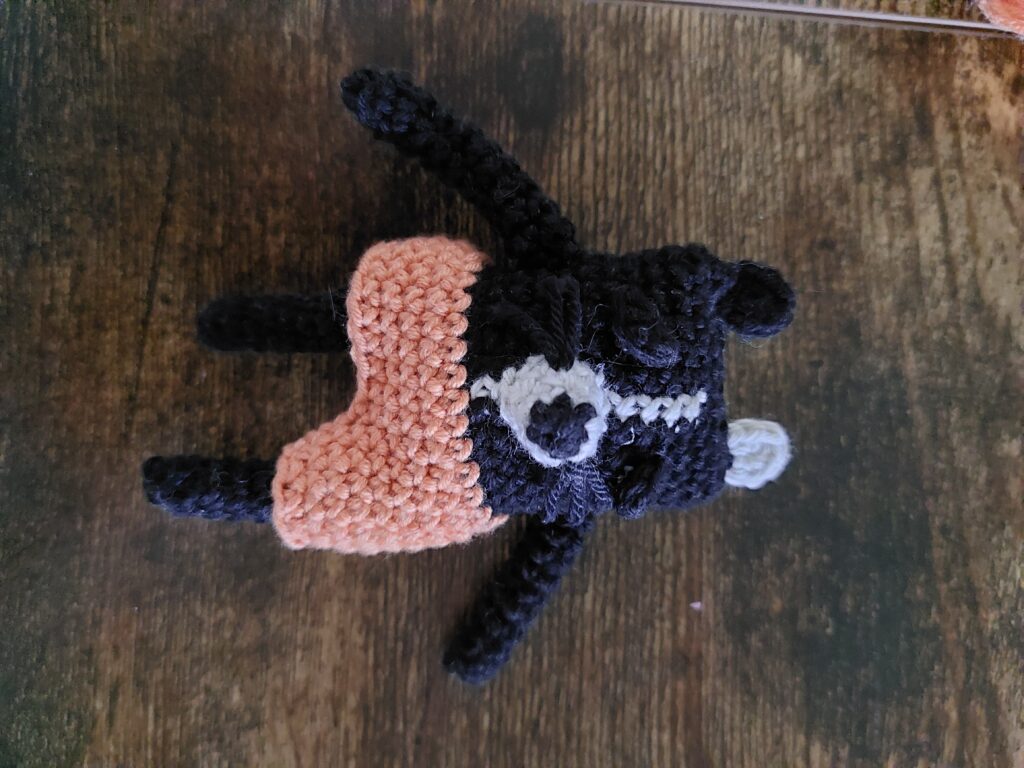
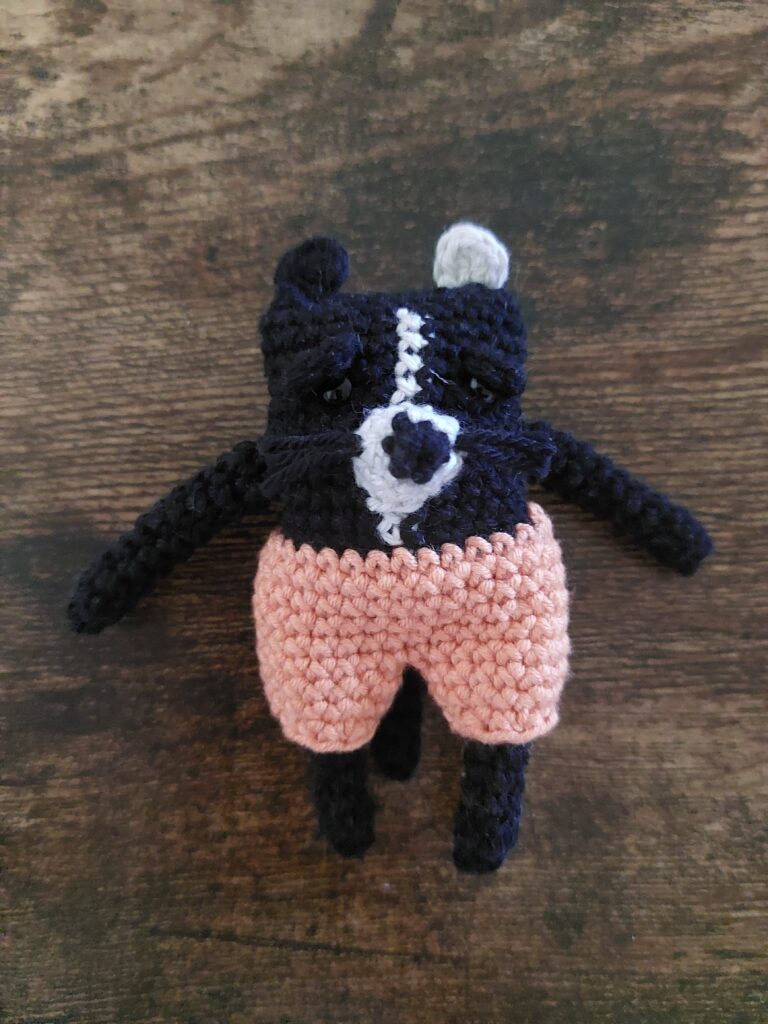
    Turn the body upside down and insert the hook into the BACK LOOP of round 4. We will crochet the trousers into those loops.
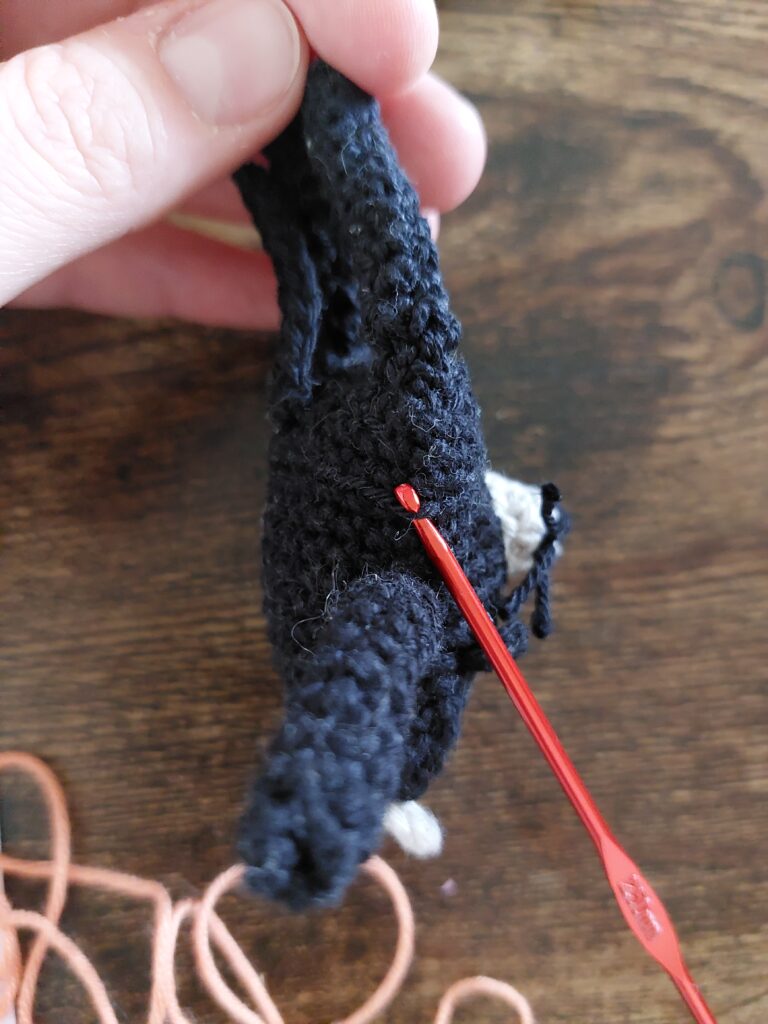
    The pattern:

    1. inc, 11 sc, inc, inc, 11 sc, inc (either slip stitch to join with the 1st stitch, chain 1 or start crocheting directly in the 1st stitch of the 1st round) [30]
    2. 6sc, chain 2 under the tail (or adjust the initial number od stitches to fit your tail placement), 22sc.
    3. 30 sc
    4. 30 sc
    5. 30 sc
    6. 8sc (or 7sc – make sure it is in the middle of the body), crochet to the other side of the shorts to make a leg opening, crochet into the 7th stitch from the stitch marker, 7sc (or 8sc – one leg must be 15stitches wide)
    7. 15sc
    8. 15sc
    9. (sc, dec) x 5 [10]

    Repeat rounds 6-9 on the other side to make the other part of the trousers. You may need to stitch the trousers in the middle.
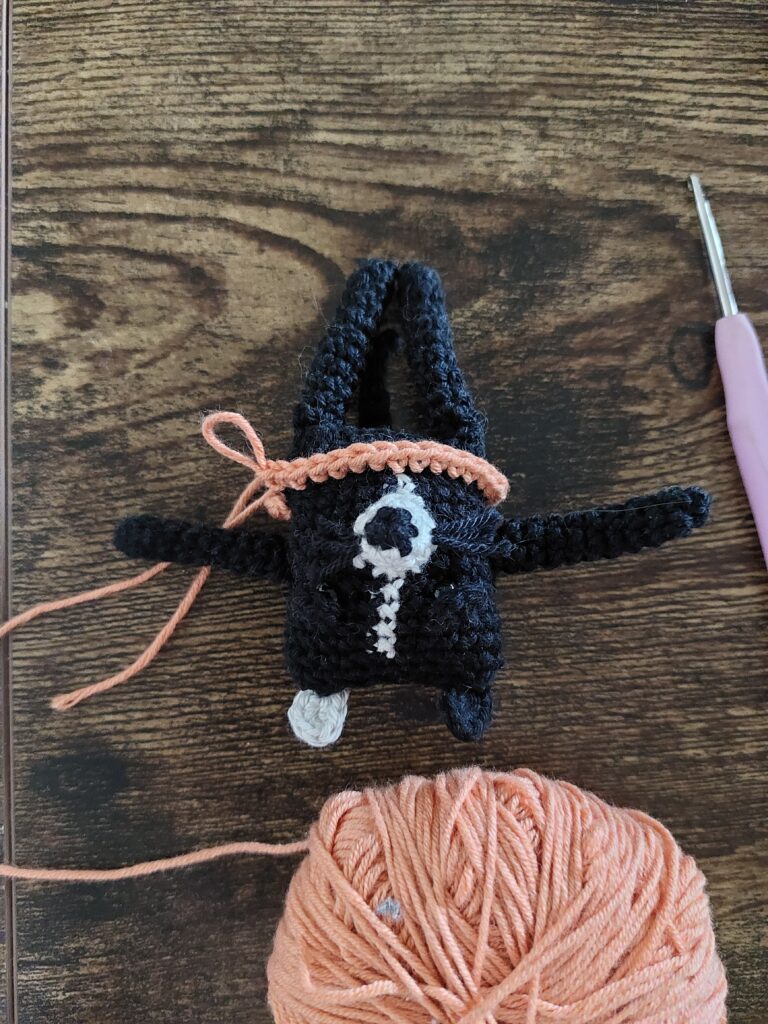
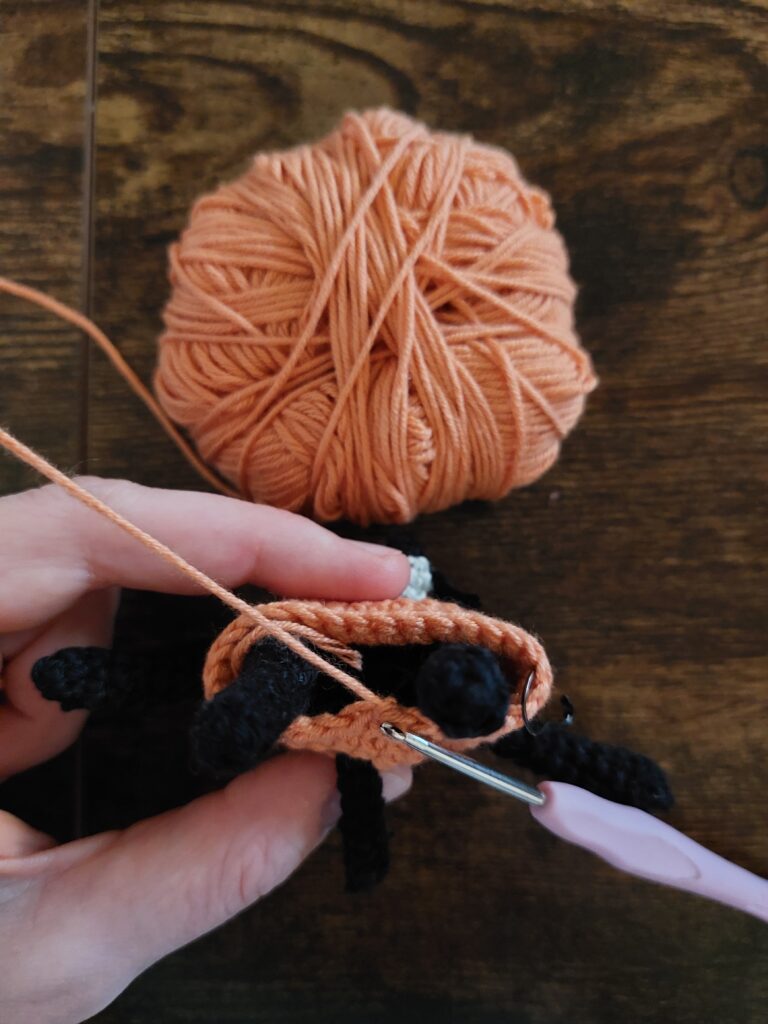
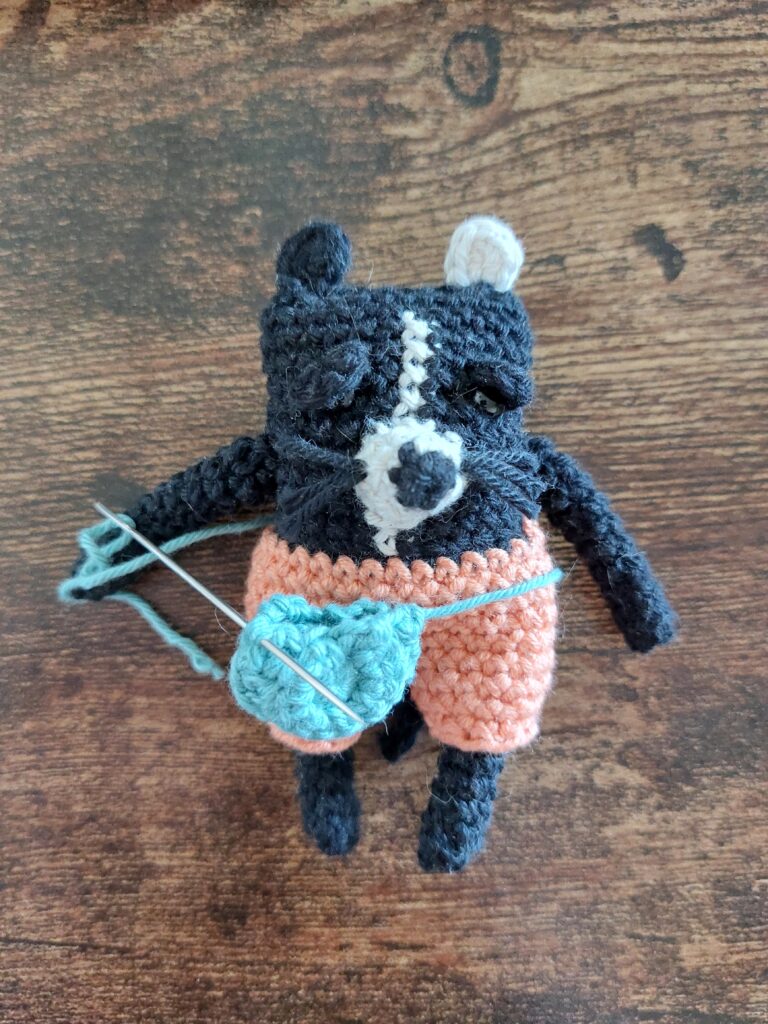
    Bag

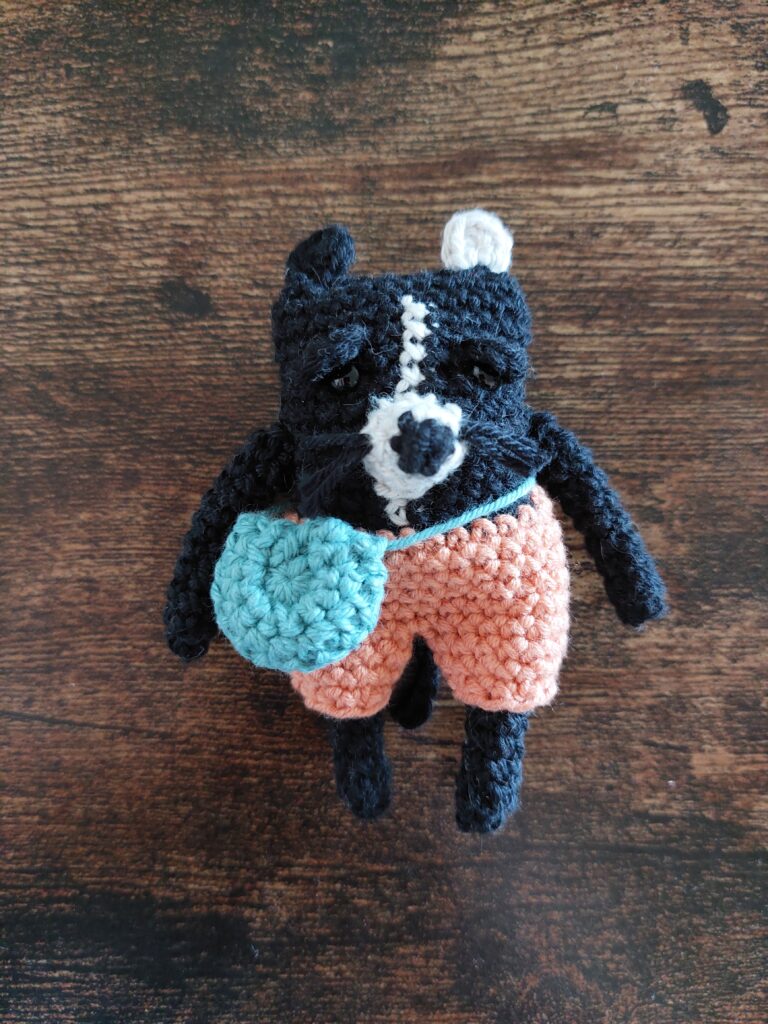
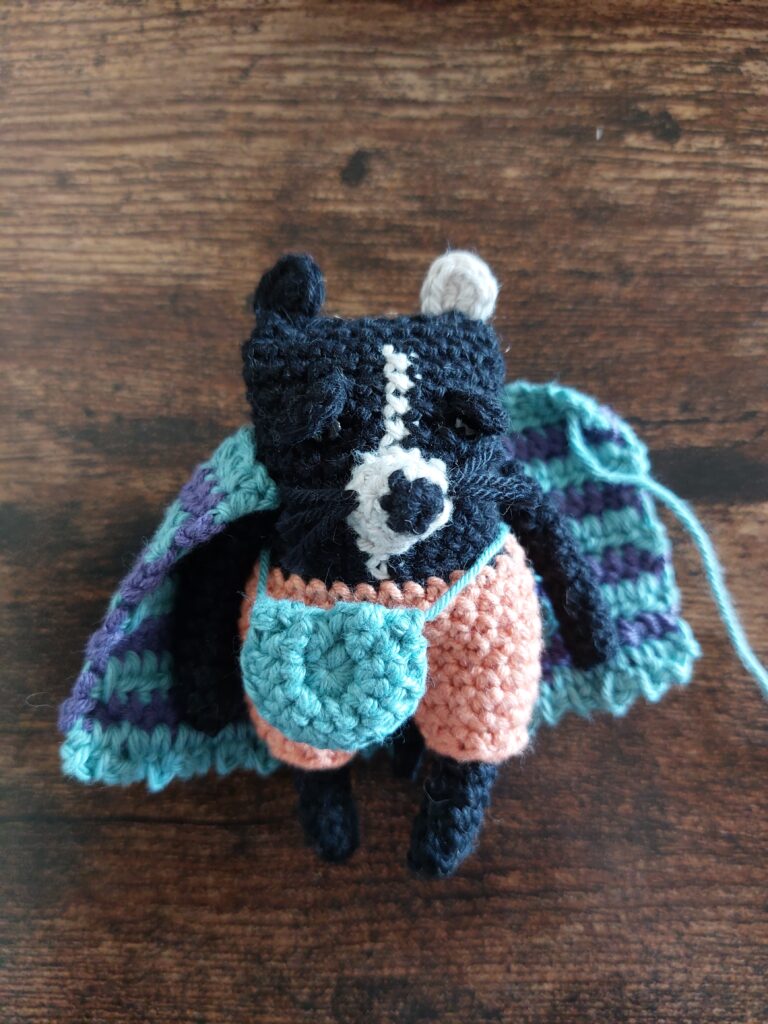
    Weave in one yarn end per bag side (the one in the middle). Stitch together with one of the other side yarn end. I weave throught only the front loops for a neater seam. Make a strap with the other yarn end, we will wrap it around the body.
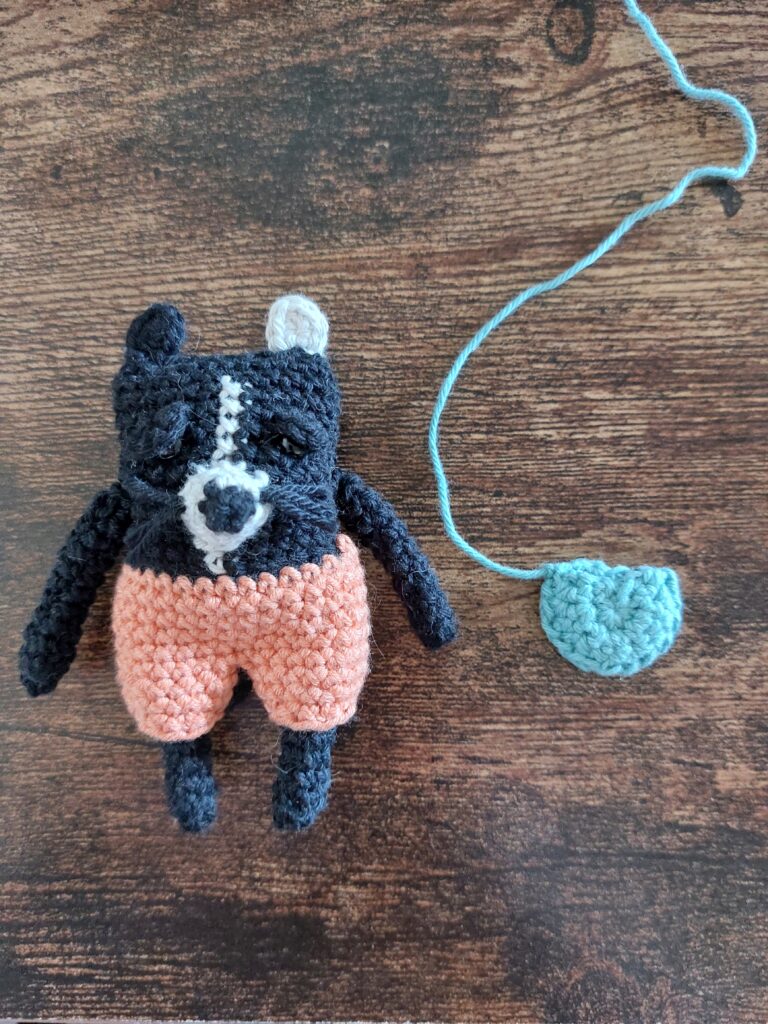
    Cape

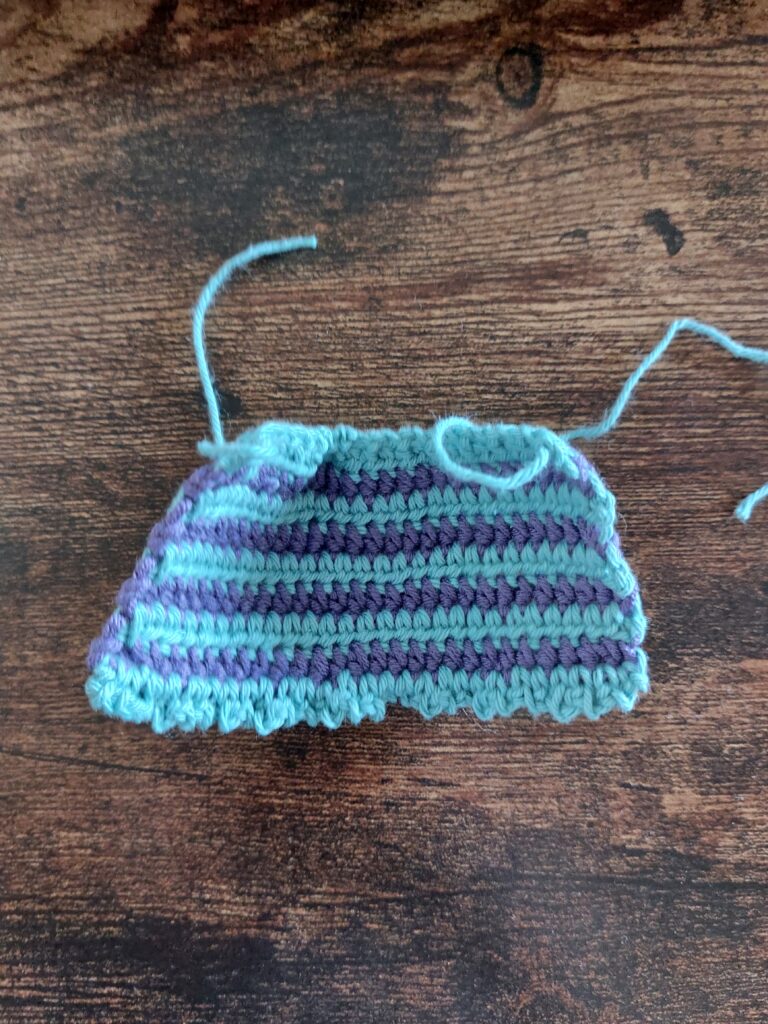
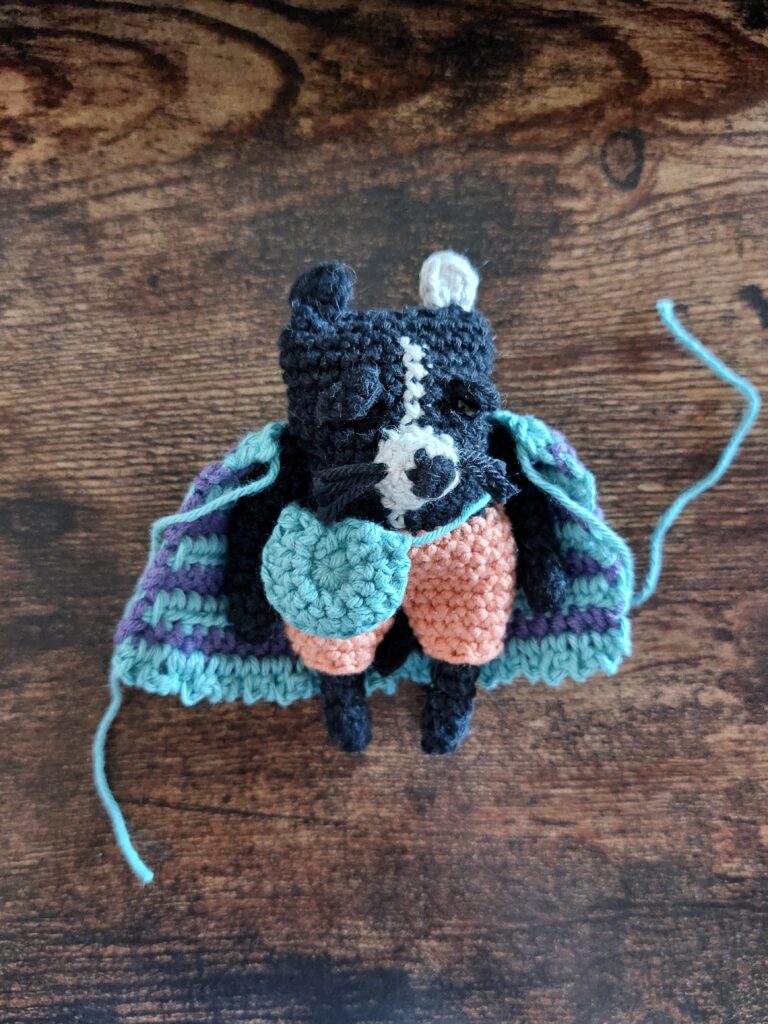
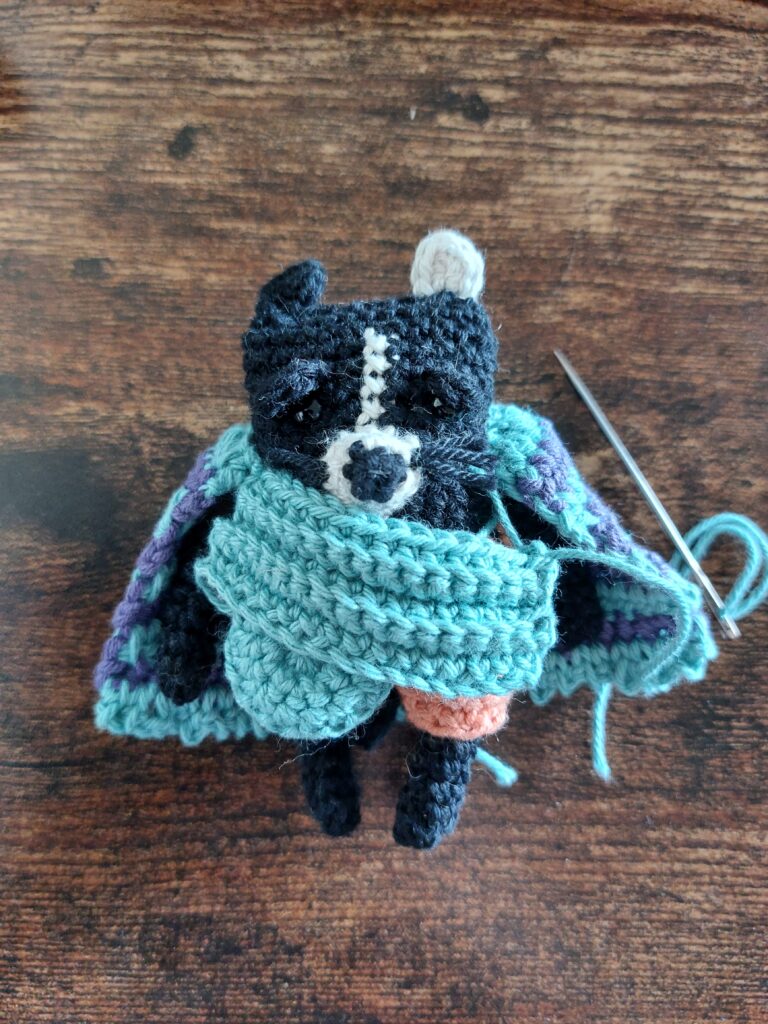
    Weave in all the yarn ends. Then weave in a new, long one through the top of the first round. Tighten. Cloak should be attached above the arms, one or two stitches closer to the centre, the cloak should cover the arms.
    Scarf

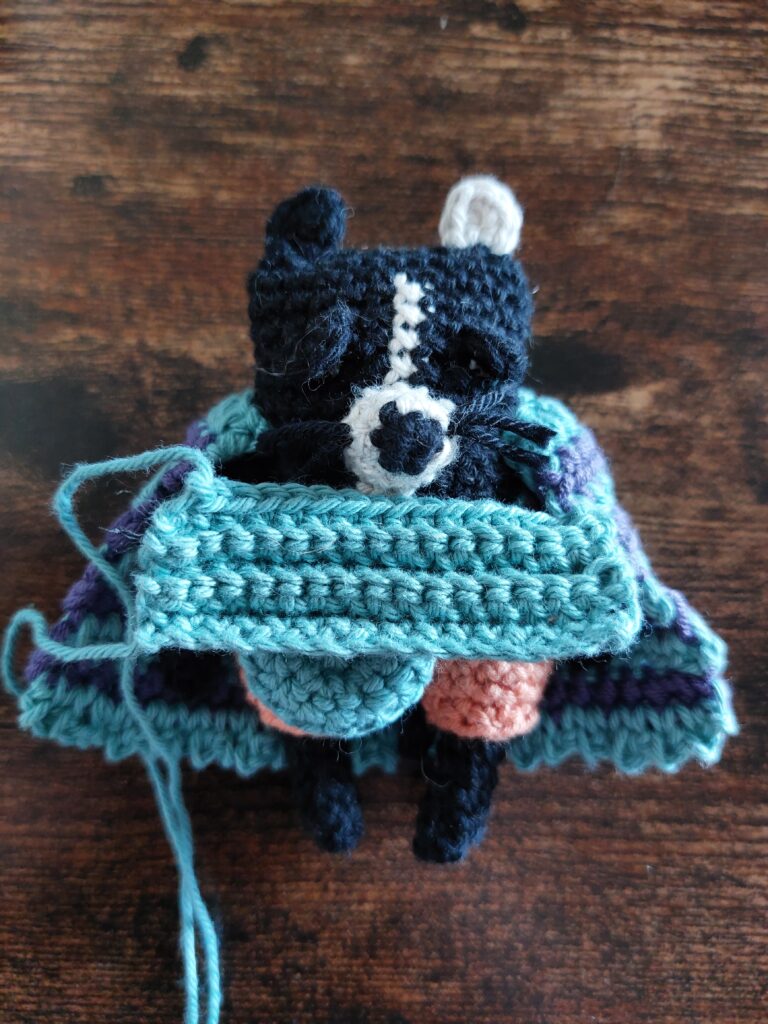
    Attach the scarf under the nose, close to the cape. You can make a smooth transition bettwen the cape and the scarf and attach the top of the scarf in the same place as the cape. I like to put the first round at the bottom.
    Hat

    Attach the hat in front of the head, to the side – the hat should slightly cover one of the eyes.

    And we’re done!

  • Heart crochet pattern (2D crochet) – three sizes

    Heart crochet pattern (2D crochet) – three sizes

    Time to crochet a heart together! I have a free 2D crochet pattern for you – it means we will start with a chain and then crochet on both sides of the chain. You can make it in three sizes – L, M, and S. I prepared a few simple graphs – this will help you navigate through the crochet journey. Whether you’re a beginner or an experienced crocheter, you’ll be able to create beautiful hearts in no time. Let’s start!

    Materials

    • yarn – any tipe you want, the pattern works with cotton, mix or fluffy yarn
    • crochet hook
    • fluff
    • scissors
    • stitch marker
    • embroidery needle

    Abbreviations

    • sc – single crochet
    • inc – increase
    • dec – decrease

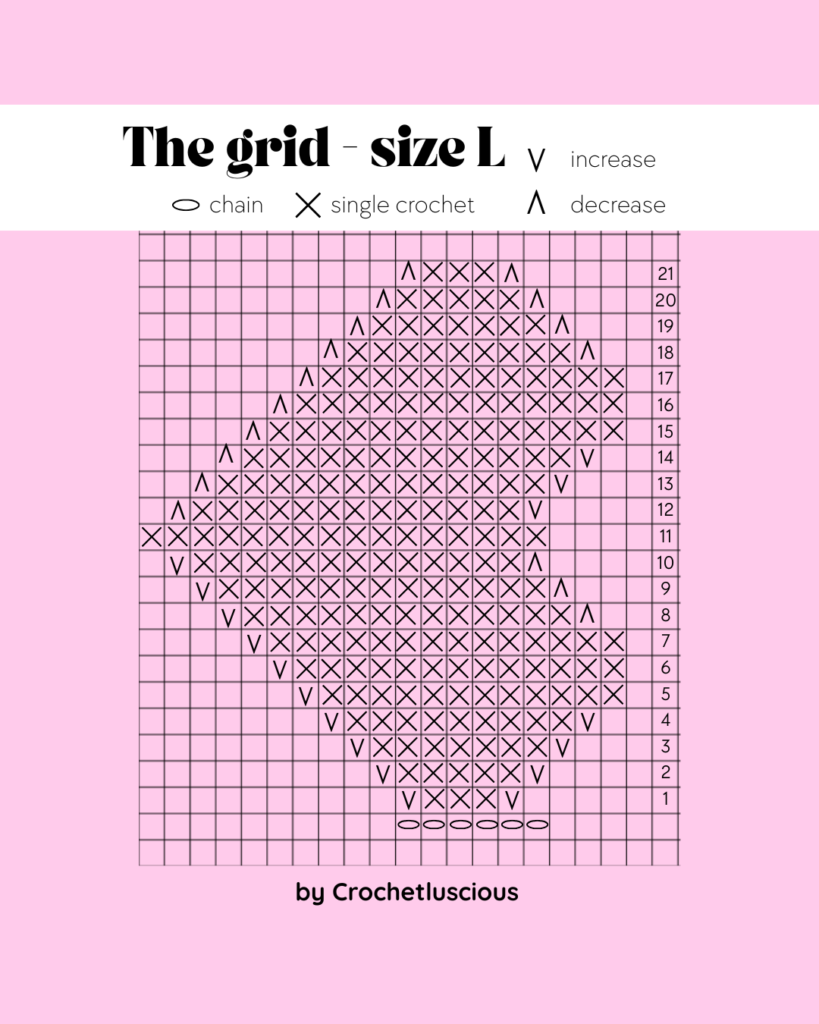
    Pattern – SIZE L

    IMPORTANT – As we work around the chain, you need to repeat the pattern on the other side of the chain!

    chain 6

    1. inc, 3sc, inc, inc, 3sc, inc
    2. inc, 5sc, inc, inc, 5sc, inc
    3. inc, 7sc, inc, inc, 7sc, inc
    4. inc, 9sc, inc, inc, 9sc, inc
    5. 12sc, inc, inc, 12sc
    6. 13sc, inc, inc, 13sc
    7. 14 sc, inc, inc, 14sc
    8. dec, 13sc, inc, inc, 13sc, dec
    9. dec, 13sc, inc, inc, 13sc, dec
    10. dec, 13sc, inc, inc, 13sc, dec
    11. 16sc, 16sc
    12. inc, 13sc, dec, dec, 13sc, inc
    13. inc, 13sc, dec, dec, 13sc, inc (stat stuffing around this round)
    14. inc, 13sc, dec, dec, 13sc, inc
    15. 14sc, dec, dec, 14sc
    16. 13sc, dec, dec, 13sc
    17. 12sc, dec, dec, 12sc
    18. dec, 9sc, dec, dec, 9sc, dec
    19. dec, 7sc, dec, dec, 7sc, dec
    20. dec, 5sc, dec, dec, 5sc, dec
    21. dec, 3 sc, dec, dec, 3sc, dec

    Close off the last stitch. Using an embroidery needle, stitch the opening. Weave in only into the front loops for cleaner edge.

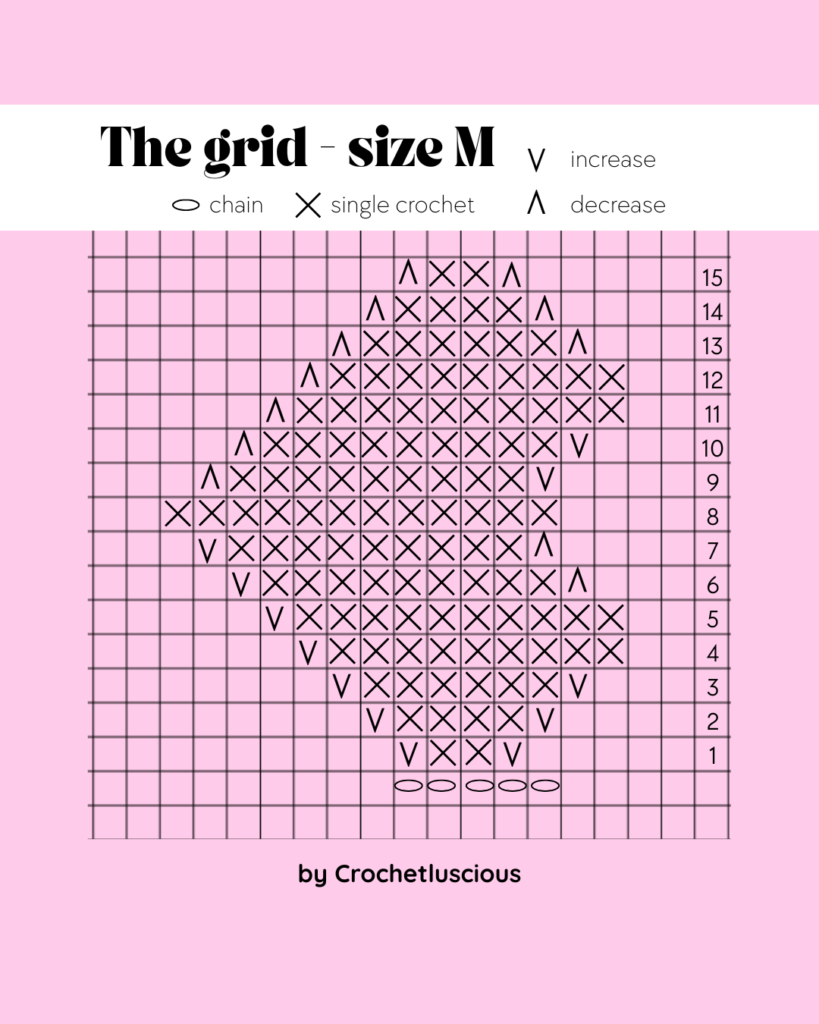
    Pattern – SIZE M

    IMPORTANT – As we work around the chain, you need to repeat the pattern on the other side of the chain!

    chain 5

    1. inc, 2sc, inc, inc, 2sc, inc
    2. inc, 4sc, inc, inc, 4sc, inc
    3. inc, 6sc, inc, inc, 6sc, inc
    4. 9sc, inc, inc, 9sc
    5. 10sc, inc, inc, 10sc
    6. dec, 9sc, inc, inc, 9sc, dec
    7. dec, 9sc, inc, inc, 9sc, dec
    8. 12sc, 12sc
    9. inc, 9sc, dec, dec, 9sc, inc
    10. inc, 9sc, dec, dec, 9sc, inc (start stuffing around this round)
    11. 10sc, dec, dec, 10sc
    12. 9sc, dec, dec, 9sc
    13. dec, 6sc, dec, dec, 6sc, dec
    14. dec, 4sc, dec, dec, 4sc, dec
    15. dec, 2sc, dec, dec, 2sc, dec

    Close off the last stitch. Using an embroidery needle, stitch the opening. Weave in only into the front loops for cleaner edge.

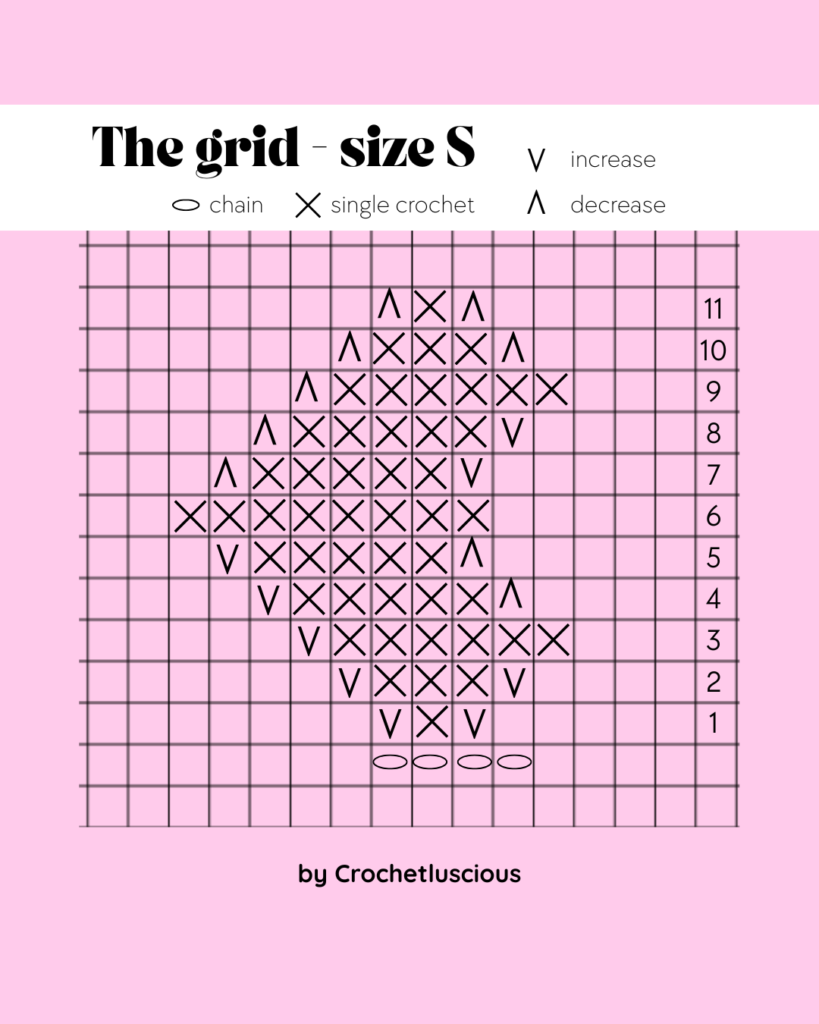
    Pattern – SIZE S

    IMPORTANT – As we work around the chain, you need to repeat the pattern on the other side of the chain!

    chain 4

    1. inc, 1sc, inc, inc, 1sc, inc
    2. inc, 3sc, inc, inc, 3sc, inc
    3. 6sc, inc, inc, 6sc
    4. dec, 5sc, inc, inc, 5sc, dec
    5. dec, 5sc, inc, inc, 5sc, dec
    6. 8sc, 8sc
    7. inc, 5sc, dec, dec, 5sc, inc (start stuffing arund this round)
    8. inc, 5sc, dec, dec, 5sc, inc
    9. 6sc, dec, dec, 6sc
    10. dec, 3sc, dec, dec, 3sc, dec
    11. dec, 1sc, dec, dec, 1sc, dec

    Close off the last stitch. Using an embroidery needle, stitch the opening. Weave in only into the front loops for cleaner edge.

    And that’s it! You have your own crochet heart. Enjoy!

    Check other free patterns on the blog!

  • Mr Cat the Adventurer – Crochet pattern PART 2

    Mr Cat the Adventurer – Crochet pattern PART 2

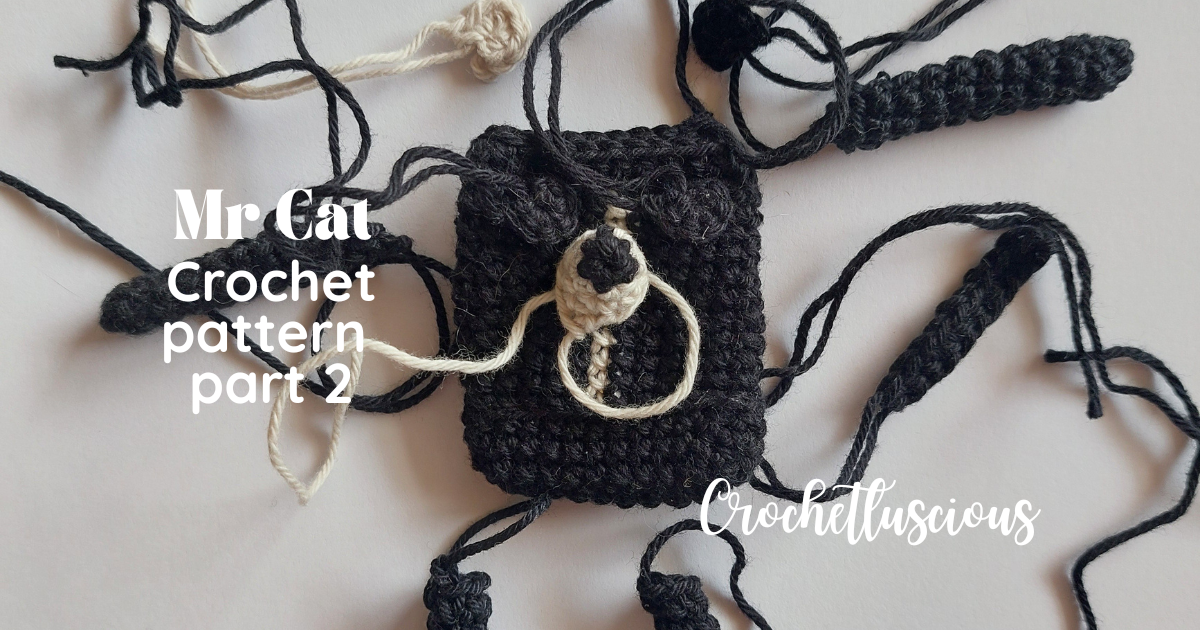
    Time to assemble the body. In this part, we will work with the nose (and whiskers), eyes with eyelids, legs, tail, and ears. We will also stuff the body and sew the last round. Let’s start!

    (więcej…)
  • Let’s make a scrunchie!

    Let’s make a scrunchie!

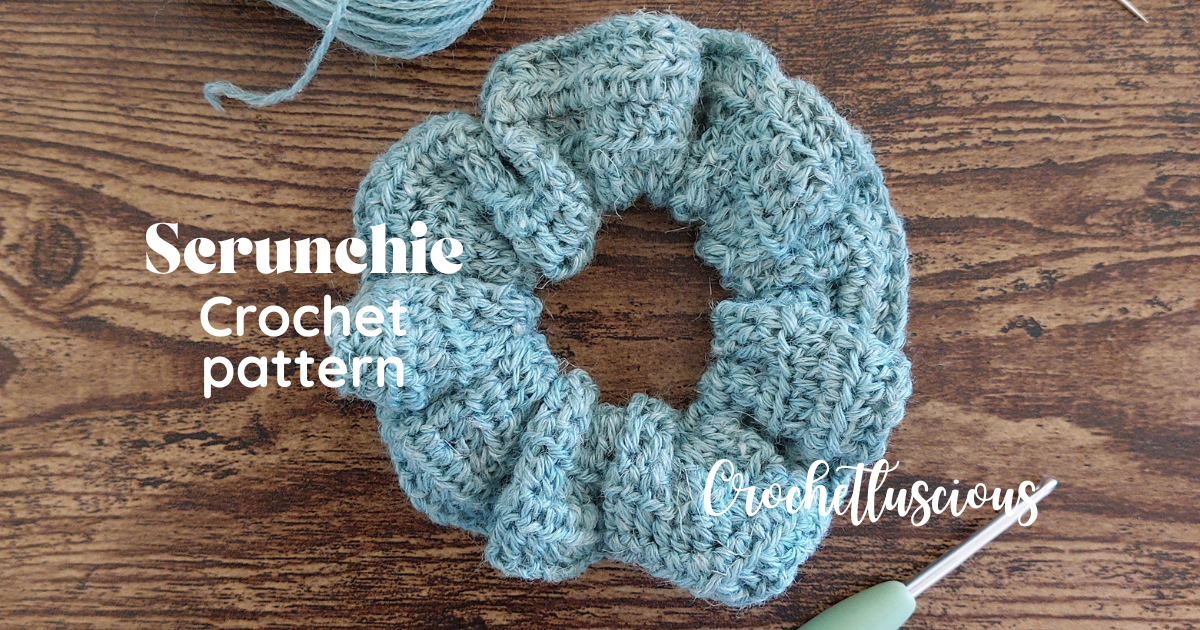
    There are at least two ways to make a scrunchie, and today we are going to explore one of them. Prepare your yarn, crochet hook, tapestry needle, elastic band, and a pair of scissors and let’s start!

    (więcej…)
  • Mr Cat the Adventurer – Crochet pattern PART 1

    Mr Cat the Adventurer – Crochet pattern PART 1

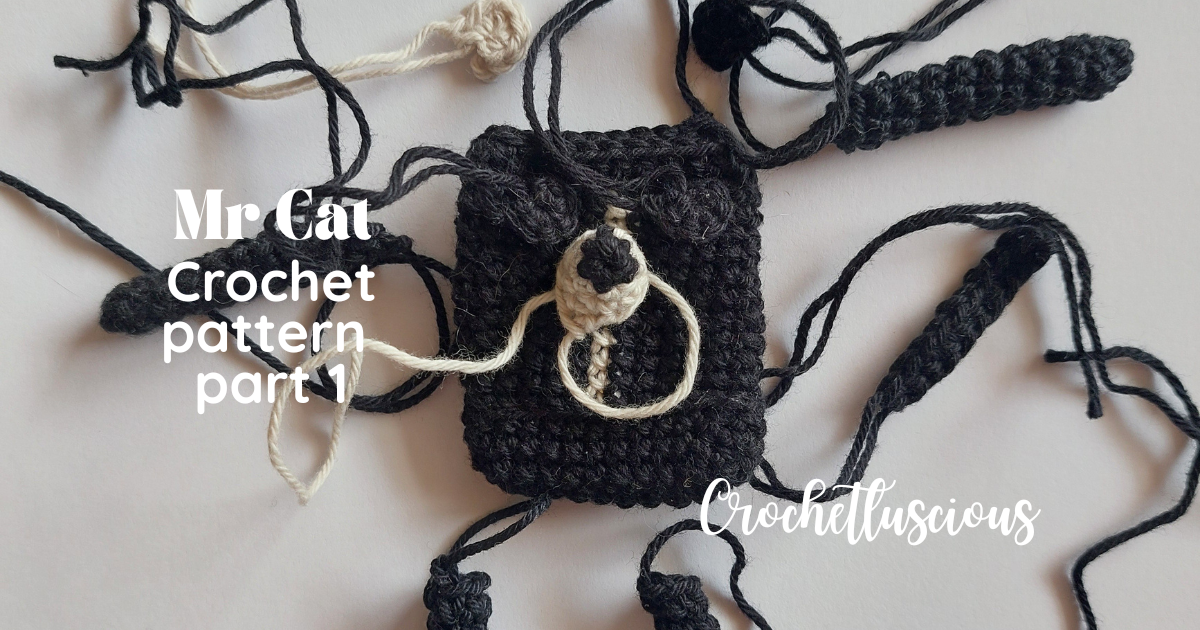
    In this post, we are going to create most of the necessary parts for making Mr Cat – a crochet amigurumi. In the next part, we will assemble the body and crochet the trousers. Then we will add the cape, the bag and the hat.

    (więcej…)
Crochetluscious
Przegląd prywatności

Ta strona korzysta z ciasteczek, aby zapewnić Ci najlepszą możliwą obsługę. Informacje o ciasteczkach są przechowywane w przeglądarce i wykonują funkcje takie jak rozpoznawanie Cię po powrocie na naszą stronę internetową i pomaganie naszemu zespołowi w zrozumieniu, które sekcje witryny są dla Ciebie najbardziej interesujące i przydatne.